SMART
Science
By Libby and Robert Strong, and Richard Pollack
Can you grow a garden in the wintertime?
“No, it’s too cold,” you might say. The following experiment
will let you grow an indoor “garden” that does not even involve plants.
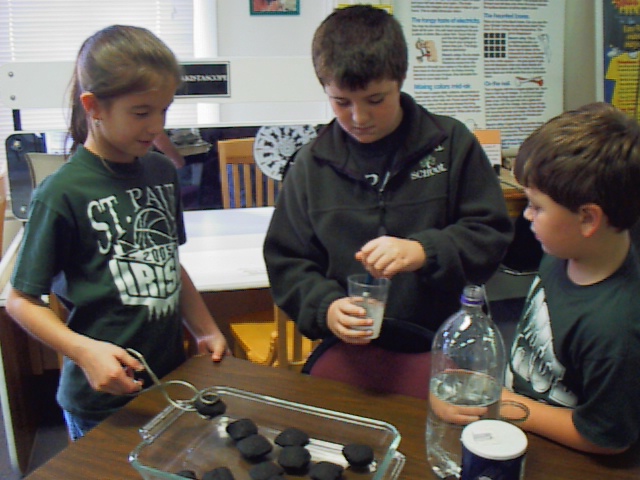
This easy experiment will allow you to grow a garden of beautiful crystals
on a bed of coal, charcoal (ask mom or dad if there is any left over from
the summer barbeques), or even pieces of sponge.
Experiment: Growing a Winter Crystal Garden
The following is a multi-day experiment.
For this experiment you will need the following materials:
A: Several pieces of “base” material, i.e., coal, charcoal, porous
brick, tile, or sponge pieces.
B: Water
C: Table Salt
D: Mrs. Stewart’s Bluing (a laundry whitener)
E: Food Coloring
F: Mixing Bowl
G: Mixing spoon
H: Tablespoon or metric equivalent (about 15 ml)
I: Baking dish or bowl (glass preferred)
(Note: some recipes for growing crystal gardens call for the use of
ammonia. The staff of the WLSC SMART-Center feel that leaving out
the ammonia make this experiment more appealing and safer for our young
scientists.)
Procedure Day #1:
Step 1: Place your “base” material pieces into the bottom of
the baking dish.
Step 2: Mix together 2.0 tablespoons (about 30 ml) water with
2.0 tablespoons (about 30 ml) salt and 2.0 tablespoons (about 30 ml) of
Mrs. Stewart’s Bluing in a mixing bowl and stir until salt is dissolved.
Step 3: Pour this mixture over the top of the base material pieces.
(Note: if you use a large baking dish and more than four pieces
of your base material, make a second batch of the mixture and pour this
over the base material pieces.)
Procedure Day #2:
Step 1: Add 2.0 tablespoons (about 30 ml) salt to the solution
in the baking dish (do not place salt on top of the base material pieces).
Procedure Day #3:
Step 1: Make another batch of 2.0 tablespoons (about 30 ml) each
of water, salt, and Mrs. Stewart’s Bluing in a mixing bowl.
(Note: If you are using a large baking dish, double this batch.)
Step 2: Do not pour this mixture onto the base material.
Rather, pour the mixture into the bottom of the baking dish.
Step 3: To add color to your coal crystal garden add a few (less
than four) drops of various colors of food coloring onto each of the pieces
of base material.
Good air circulation and the dry air conditions of winter will actually
make your crystal garden grow best.
To keep your crystal garden growing all winter long, watch the solution
material in the bottom of the baking dish. When the solution dries
out, make another batch of the water, salt, and Mrs. Stewart’s Bluing (two
tablespoons (30 ml) each) and pour this into the bottom of the baking dish.
Remember, do not pour the solution mixture on to the base material or on
to your crystals. Your crystal garden is fragile. Do not move
it around the house.
Question: What are the crystals made out of?
Question: What role does the base material serve in growing
your crystal garden?
Question: What are the individual roles of the water, salt,
and Mrs. Stewart’s Bluing in the formation and growing of your crystal
garden?
To find out more about growing and making crystal gardens visit our
website at: http://smartcenter.org/OVPM/growingcrystalgardens
Examination of Snowflake Crystals
So, you think that crystals are cool, eh?
Well, snowflakes really are cool crystals! Have you ever
looked at snowflake crystals closely? Would you be surprised to find
out that all snowflakes have six sides or points? Don’t take our
word for it. Try this activity the next time it snows.
For this activity you will need the following materials:
A: Fresh snow - it would be best if it were actually snowing
when you do this activity.
B: Dark colored paper (construction paper works well).
C: A magnifying glass (if you have one).
Procedure:
Step 1: Check to see that it is snowing outside. If it
is snowing, gather the above materials and get out the hot chocolate fixings
for when you come back inside.
Step 2: Ask permission to go outside. Invite your parents
to help. Don’t forget to dress warmly.
Step 3: Take the dark colored paper outside and let it get cold.
This should only take a minute or so.
(Note: If the day is sunny, do not let the sunlight shine on
the paper. It will warm it up and will melt the snowflakes.
Let your shadow fall onto the dark paper to keep it cool.)
Step 4: Let the snowflakes fall onto the dark paper and look
at them closely with your eyes or magnifying glass. Warning!!!!
Do not breath directly onto the snowflakes, hot breath may melt them.
Question: Have you ever heard the saying that no two snowflakes
are the same? Do all the snowflakes look similar? Are any the
same?
Question: Why do snowflakes have six sides or points? Why
not four, five, or seven sides or points?
To learn more about snowflake crystals visit our website at:
http://smartcenter.org/OVPM/snowflakecrystals
What’s Up? Wondrous Winter Night Sky
Winter time in the Northern Hemisphere is excellent for stargazing.
Bundle-up on a clear evening and go out with your parents and look up.
For more information on upcoming free astronomy events at Brooke Hills
Park , visit our website: http://smartcenter.org/whatsup
Libby and Robert Strong and Richard Pollack work at the West Liberty
State College SMART-Center. Libby is the director of the West Virginia
Handle On Science Program that brings hands-on science kits into the classrooms
of K-6 grade public schools in the five counties of West Virginia ’s Northern
Panhandle. Robert is the Director of the WLSC SMART-Center, the hands-on
science center of northern West Virginia .
Richard serves as the Assistant Program Coordinator at the SMART-Center.
Libby, Robert, and Richard invite you to visit the SMART-Center website
at: http://smartcenter.org